Progress

The restoration continues at a slower pace currently however we have made some progress. I have the fresh water pump working although there appears to be a lot of sediment in the water tank. I have tidied up and repainted the galley area and which a full refurbish will be needed in the long run a tart up is sufficient for the time being. I have also fitted my new (new to me) 150% Genoa from North Sails. Its a beaut and had only been used once previously inland and was found to be too heavy and swapped out for a lighter one. My luck as it needed to be slightly shortened but fits 100% and looks great. I have also looked at and rerouted the control and reefing lines which were a mess.

I have noticed an issue with the batteries and suspect at least one of them is knackered and all of them went flat very quickly recently. I now have a smart charger as well as my car charger on the  boat and have the batteries charged and will monitor their performance. Unfortunately they are both sealed so no way to check the specific gravity of either battery to tell if they are salvageable and I hate the prospect of being stuck with a flat battery at sea,

The next big job will be to tackle the heads. It looks terrible and hasn’t been touched in ages. At least its a Baby Blake so Im hope with a bit of effort i can get it up and running. Have to admit I dont like working in the heads as it seems to be designed for very short people to work on and I can never get my 6″4″ frame in anywhere to fit the pipes…..

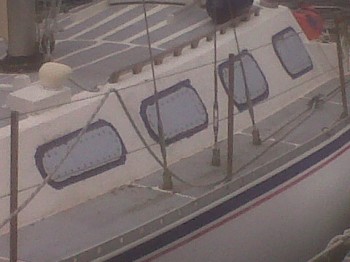


New windows

The new Port side polycarbonate windows complete with the outside covering still intact and fully sika’ed in. I started with the replacement of all eight windows last week. I totally underestimated that piece of work. Of the eight windows only two came out in a single piece and the rest had to be chiseled out piece by piece. That meant that I only had two templates to cut and shape the new windows from. As was true to form each side was slightly different so a common template couldn’t be used. That would make things far too easy. However I did visit a local craft shop and get some large sheets of brown light card and used this to copy the outline of the windows as well as the screw holes. This enabled me to make a template onto the sheet of new polycarbonate and shape trim and pre drill all of the holes for mounting. Once I had the new window ready I dry fitted it to ensure that all of the holes lined up, which some didnt and had to also allow for some screws which had broken off buried in the coach house. Once this was completed I had to strip off the old silk (with a large Chisel, Thanks roger0 and prepare the surface for the fresh Sika and the window mounting. Prior to the fitting I taped off the area around the window with the expensive blue masking tape, liberally applied the Sika and attached the window with two screws at either end of the windows to get some sort of alignment. I  then started to put in each screw loosely as there was some jiggling of the windows to get as many screws as possible to fit. Once all of the screws were in I started to tighten them down. After that I applied some more Sika to the end and shaped it to meet the edge of the coach roof. Once all of the Sika had dried up I removed the excess with a stanley knife and tidied up the seams. I am quite happy with the result however now the coachroof looks shocking. Think I”ll try some spirit of salt to tidy it up.